Help Center:
A step-by-step guide on how to activate Office 2024


How to install Microsoft Office 2024?
Step 1: Clearing Existing Office Applications
Prior to installing your new Office application, it’s crucial to remove any existing Office applications from your computer. This step is essential to prevent potential conflicts that could disrupt activation.
Here’s what you need to do:
Uninstall any previous versions of Office.
Ensure to remove OneDrive and any other Office-related applications.
Removing MS Office applications will not affect your files. If you uninstall Office 365 to install Microsoft Office 2024 Professional Plus, your existing Office files (Word documents, Excel spreadsheets, etc.) will not be deleted. These files are stored separately from the Office software itself. Your files are securely saved on your device, and you can easily access them with the new Office applications. You can also make backups of your files.
Note: For thorough removal of all old Office versions, you can utilize the Microsoft Tool for Simple Bug Fixes. Microsoft offers a comprehensive guide on uninstalling previous Office versions, particularly if you’ve previously used Microsoft 365. You can access the guide from the link here.

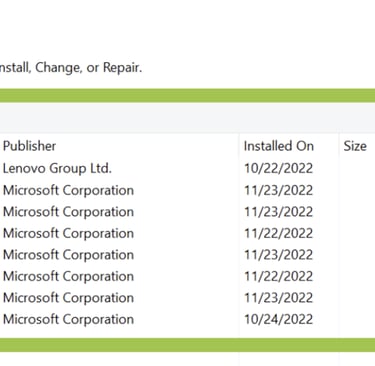
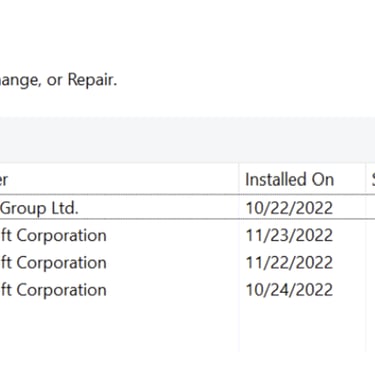
Once you’ve confirmed that no Office applications remain on your system, you’re ready to set up your new Office.

Step 2: Downloading Your New Office
After receiving the email with your product information, you’ll find links to download the Office suite you’ve purchased. To initiate the download:
Click directly on the link provided in the email.
(you can copy the link and paste it into your internet browser. We suggest trying different browsers if needed.)You can also access the installation links by clicking on this provided link.
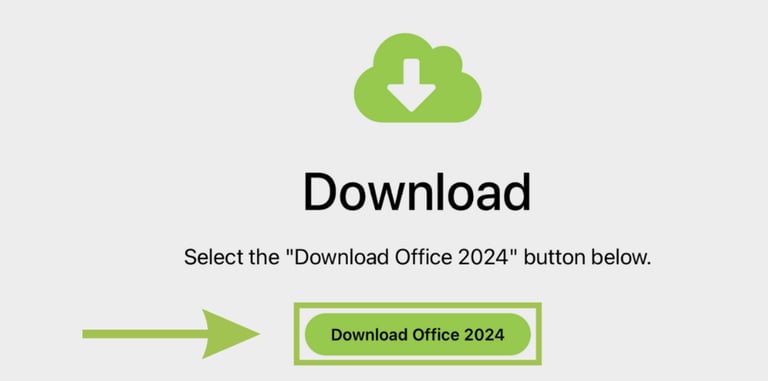

Click Download, then the installation file will be downloaded.

Step 3: Opening the Downloaded File
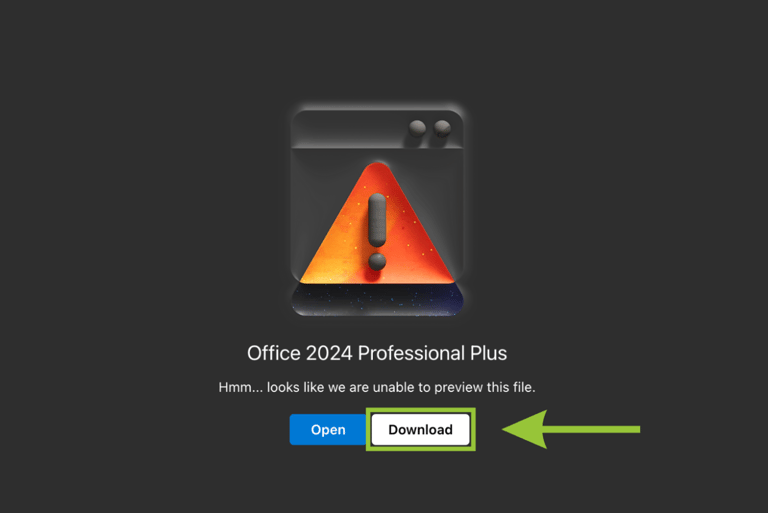
Once the download is finished, locate the file in your downloads folder. To open the file, simply right-click on it and select “Mount.”

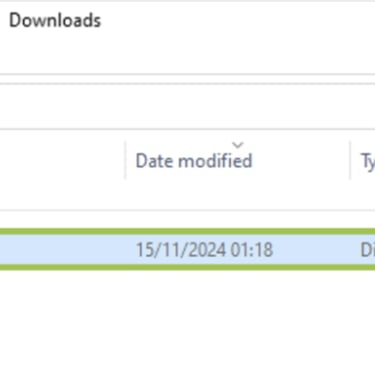
Note: If you encounter difficulties opening the file, try right-clicking on it, selecting Open with, and then choosing Windows Explorer. This should open the file properly.
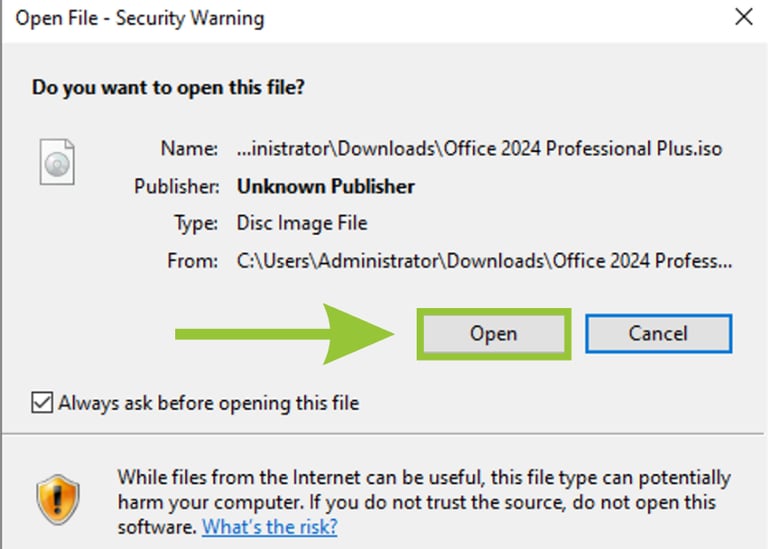
You may encounter a warning regarding potential risks associated with these applications. Please disregard this warning and proceed by selecting the “Open” option. If you have any concerns about the safety of the file, be assured that it has been shared by Microsoft and is verified as safe.

Step 4: Initiating the Application Installation
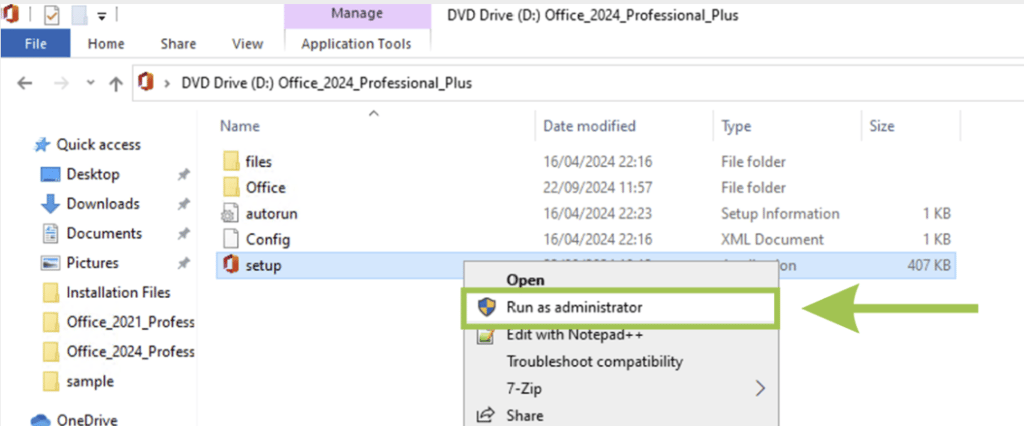
To begin the installation process, right-click on “Setup” and select “Run as administrator“.

Step 5: Activating Your Applications
Click on the “Install now” to initiate the installation process.
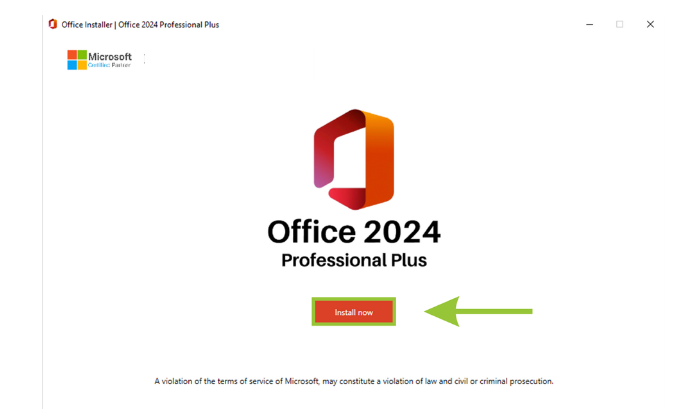

Once the installation is complete, click on “Close.”
Once the installation process is complete, you can simply open any Microsoft Office application, such as Excel.
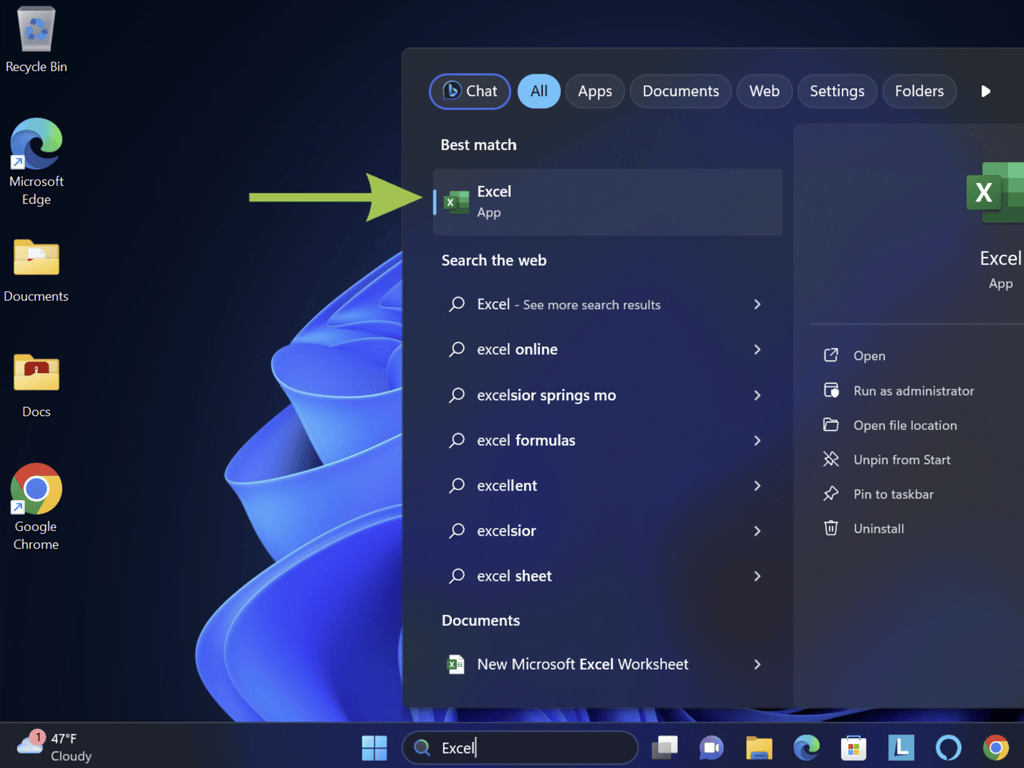

Please ensure to accept the license agreement.
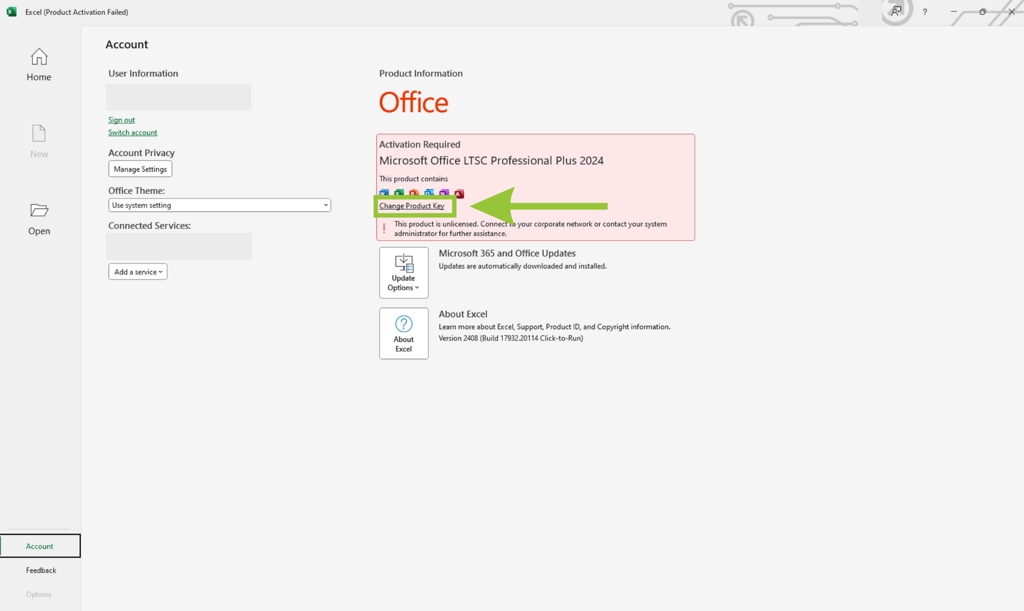
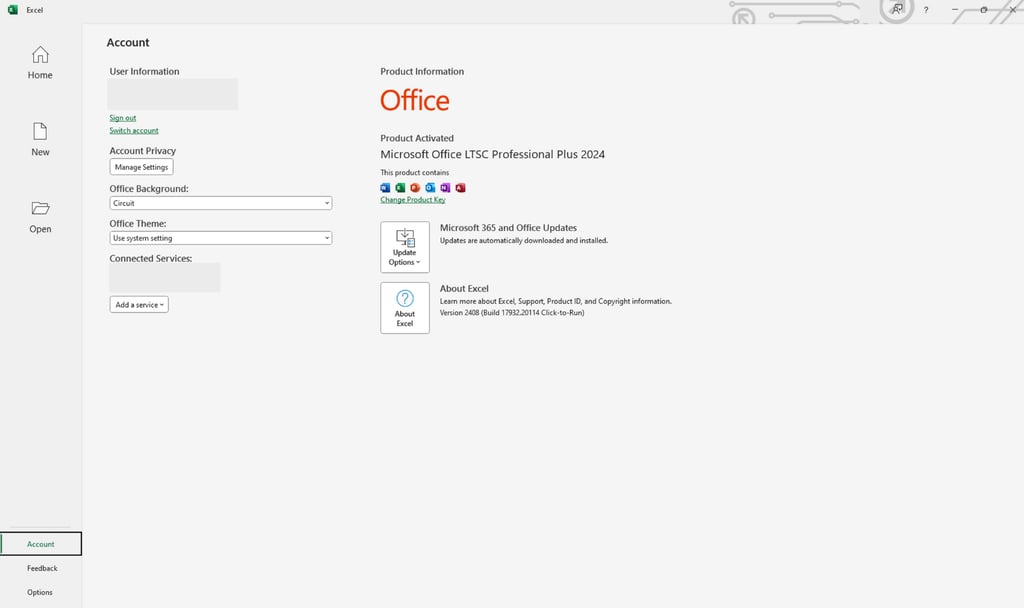
Navigate to the “Account” section located at the bottom-left of the application.Click on “Account,” then select the “Change Product Key” or “Activate Product” option.

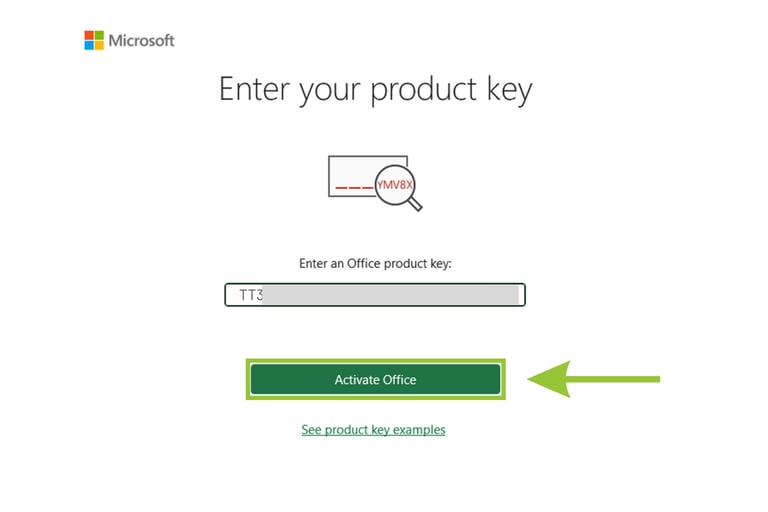
Enter the 25-character Office Activation product key that you received from us. Once you’ve entered the product key, click on “Activate Office.” Your product will be successfully activated at this point.

After clicking Activate, your Office 2024 package will be activated. Please restart your device, open an Excel file, and verify the activation.
If you receive an activation prompt, select “I want to activate the software over the Internet (recommended)” and click Next to complete the activation process.
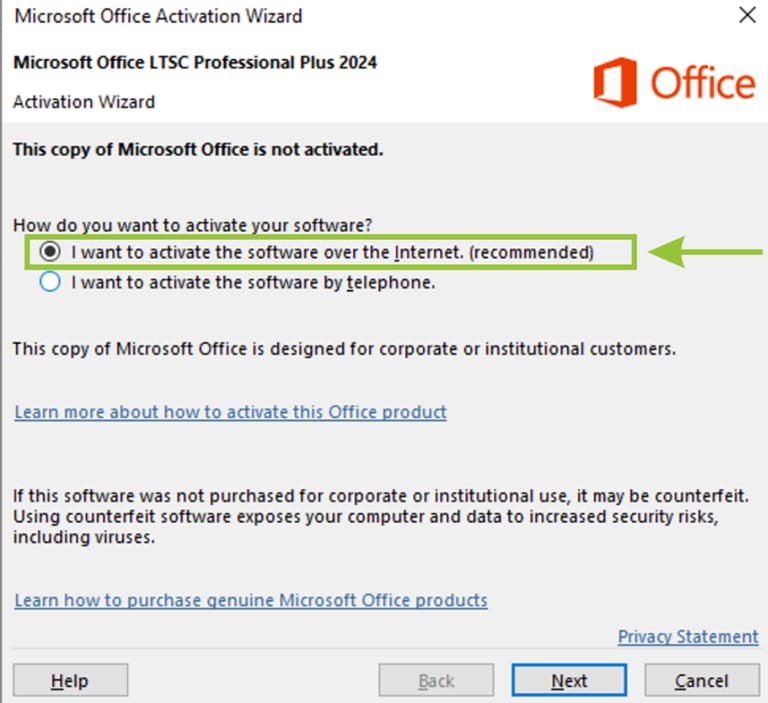

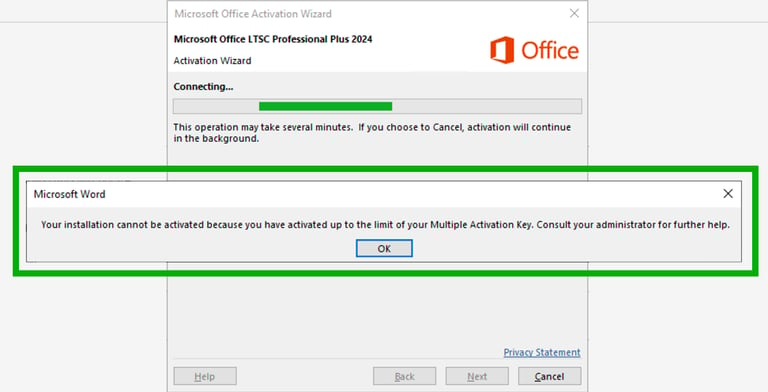
If you encounter the error message shown below, you will need to activate using the telephone method:

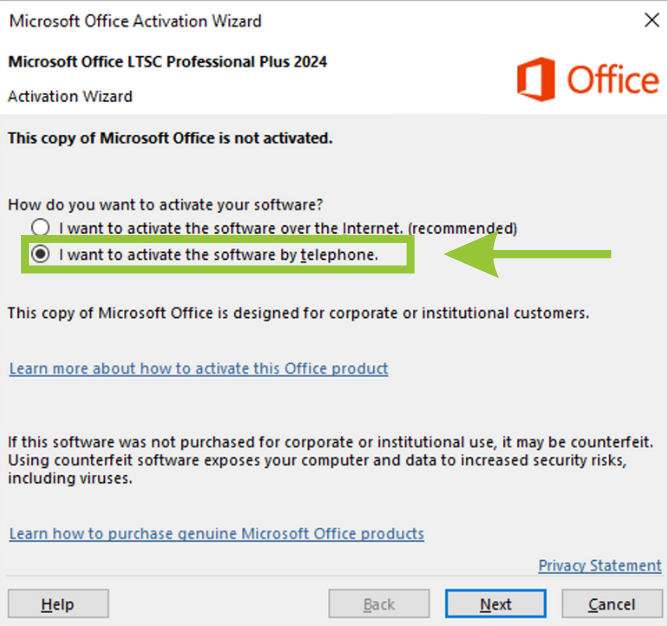
Open the Microsoft Office Activation Wizard and select “I want to activate the software by telephone.

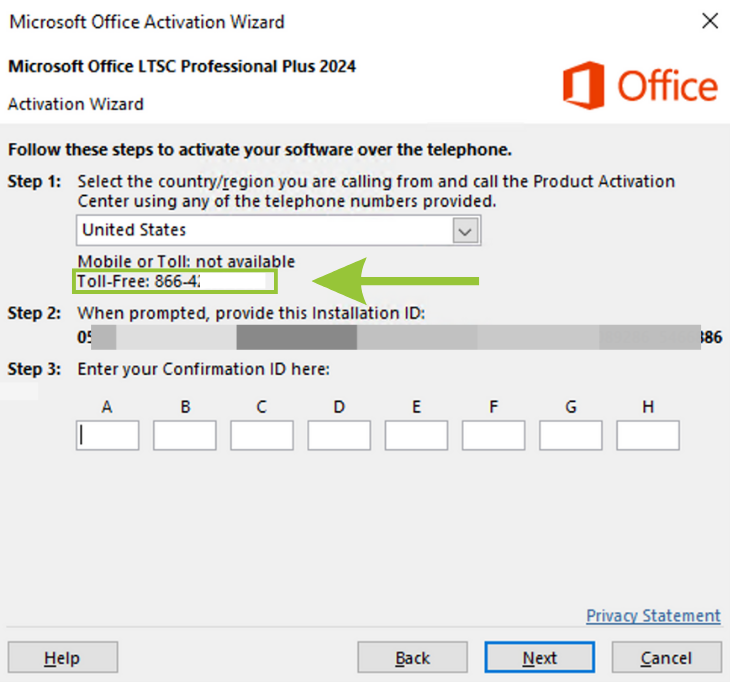
Select your country from the list and call the provided Product Activation Center number.

Microsoft may send you a link to complete the activation on your phone. Follow the link. Input the Installation IDs displayed in the Activation Wizard into the appropriate fields on the link.
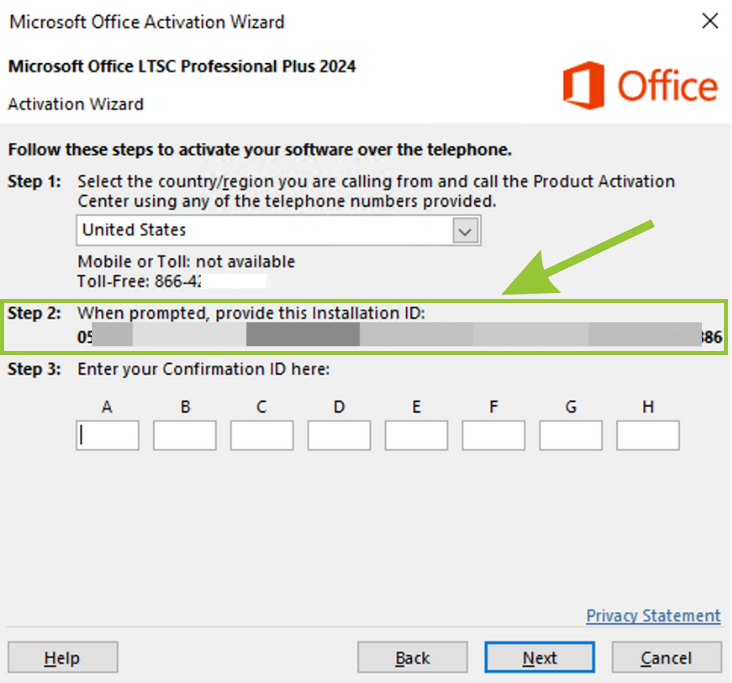

After receiving the Confirmation IDs, enter them into the corresponding fields in the Activation Wizard.
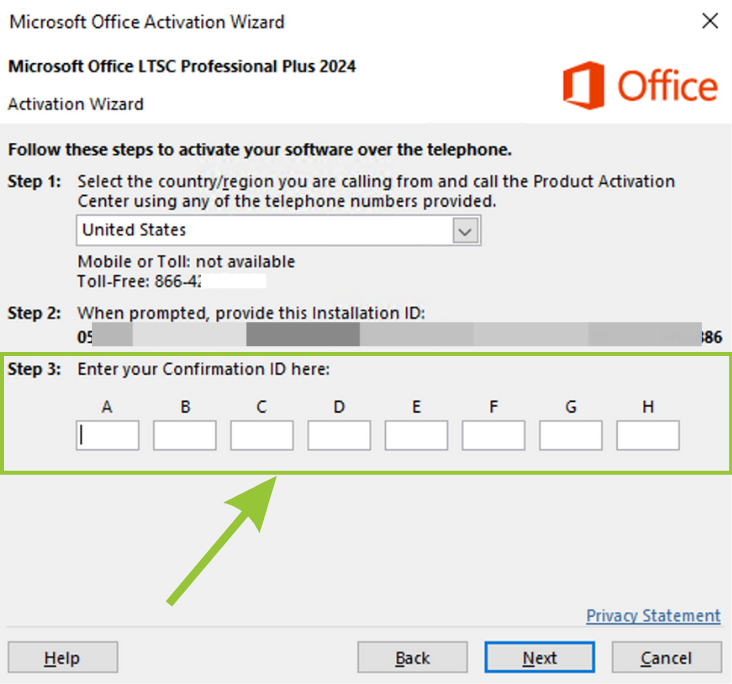

Press Next to complete the activation process successfully.
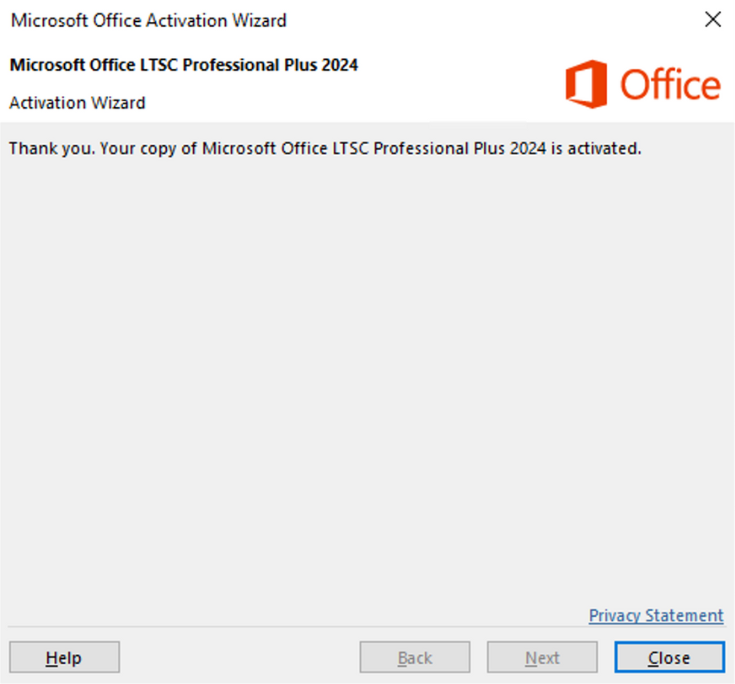

Congratulations! You’ve completed the activation process and now have permanent access to your Office application.

Should you encounter any difficulties during activation or have questions, please feel free to reach out to our support team.
Innovative
Cutting-edge technology solutions enhancing efficiency and productivity.
DESOL LLC
Professionalism
© 2024. All rights reserved.
